
* Make sure you read the update at the end of this as well as the post…
Towing a fairly heavy trailer every day I have noticed the saggy butt on my old cruiser and decided it was time to do something about it.
I had some poly-airs on my previous GQ Patrol and they did a good job of regulating the levels when loaded up, so at $275 on eBay I figured there wasn’t much to lose.
Installing looked pretty simple and bar a few annoying inconveniences wasn’t too bad. For those who also find the Poly-air ‘instructions’ close to useless here’s what we did with some pics.
I began on my own but a mate offered to help and skin his knuckles on the difficult to access screws so I gladly accepted 
To be fair the instructions point you in the right direction but just don’t answer the tricky questions.
So to get rolling we jacked it up, (did one side at a time) stuck an axel stand under and got cracking. The instructions suggest you may be able to use a bump stop, but we found it was positioned too far back to allow the bottom bracket to be fitted.

The first trick is to drill the holes in the chassis rail. Not too hard but tricky access. Make sure you drill 1/4 inch holes for those bigarse self tappers though because I managed to shear one off first time around and no one carries them. I ended up using a smaller gauge self tapper to do the job and hopefully it will be ok.
The screws go in slowly… Before you fix it in place be sure to connect the air hose as it would be hard afterwards.
The bottom bolts were a concern because they splayed somewhat when seated on the leaf spring but we managed to tighten them up and eliminate most of the angle once the bracket was fitted. They supply you with two brackets, but don’t tell you what the other one is for… I threw it out as it didn’t seem to be needed.

Once the nuts on the bottom are tightened up (be sure to insert the small horizontal bracket before doing so) you are good to run the hose – pretty easy. I ran mine to the back bumper and drilled a couple of holes there for the valves.
We inflated them briefly to make sure they were running the minimum of 5PSI, but didn’t realise how quickly they went up. I checked the pressure and it was 50… oops… The max is 30 so we quickly let some out.
We ground off the ends of the bolts to tidy it up and then did the same on the other side
 I’ve set it around 18PSI and it sits level but I’ll be experimenting for a bit to see what works best. Definitely a firmer ride and should be well worth it.
It only took 2 1/2 hours so isn’t a big job. But as I said, the instructions are pretty dodgy in places so hopefully this will help you if you get stuck.
*Update
Ok – so we did this and had a few brackets left over. I had emailed Polyair and the mob I bought these off to clarify instructions as the ones that came with the kit were pretty average.
It turns out there aren’t supposed to be any brackets left over… So began the task of figuring out what I had got wrong. It turns out the other bracket is intended to sit under the poly air spring and on the top of the leaf spring
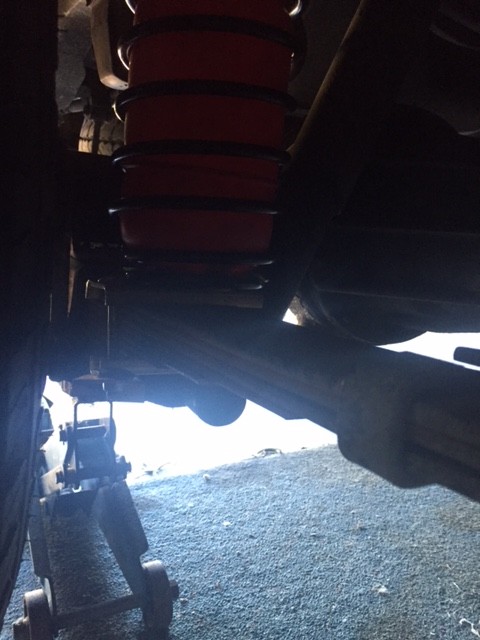
Its a bit hard to see it in this post, but essentially it connects to the circular plate under the spring and then is joined to the bottom bracket by the bolts. Its a much better setup now and feels a lot more secure. It also explains why the bolts splayed like they did… They were never supposed to sit like that in the first place. Polyair could do with sending a photo of the finished set up out with their instructions as I’d be guessing I’m not the only one who has found it puzzling. Anyway problem solved.
looks dodgy, and flimsy on the bottom bracket, is it ok to cut the bolts down?
why not just up your spring rate
I dunno… This is what they supply and how they do it so I am guessing its ok. I imagine they wouldn’t supply them if they were dodgy. They recommend cutting the bolts down. Otherwise they just hang
Can’t just up the spring rates without affecting the leaf spring rebound ratios. The bottom bracket is actually pretty tough, I checked it out. Bear in mind it is not a linear load bearing point but rather more a bracing/locating bracket.
The main load is carried by the airbag, which is supported by the spring. We actually did a pretty good job I reckon. Hamo has got some killer drill stress testing skills though! LOL
A new business skill for you hammo? Maybe add it to your website… Along with retaining walls.
Lol maybe Roodog,
But just don’t let the fellow near your drillset, he has a thing for clipping their wings! LOL. Other than that, I found him to be handy about the tools. The kind of guy that I would have in my workshop. Thanks for letting me help Hamo, it was awesome. I love mech/DIY/problem solving, it’s just so my thing.